本文我们要讲解单线多拨在OpenWrt系统中的实现方法。在前面讲解mwan3应用时我们有讲到单线多拨的情况,即利用一路WAN物理口,来实现多拨的效果。在家庭宽带早期,带宽非常有限,宽带供应商对同账号多拨的情况也限制得不是太严厉,这时通过单线多拨及负载均衡应用,假设原宽带是20M的,同时允许你拨号5次的话,理论上我们就可以将带宽提升到100M,因此在前期这种应用还是非常吃香的。现在宽带的带宽已能满足大部分的家庭使用场景,而且供应商也限制了多拨的次数,有些干脆就不允许了,也有些允许2次,但限制2次多拨的带宽叠加不超过你所申请的带宽,因此这种应用在近几年的使用场景就变得越来越少了,但是做为一种技术储备,我还是想把它分享给大家。
一、安装
安装macvlan应用,将一个WAN物理接口虚拟出多个接口来,然后再用于建立多个WAN口。
opkg update
opkg install kmod-macvlan
二、配置
1、先删除原先的wan及wan6接口
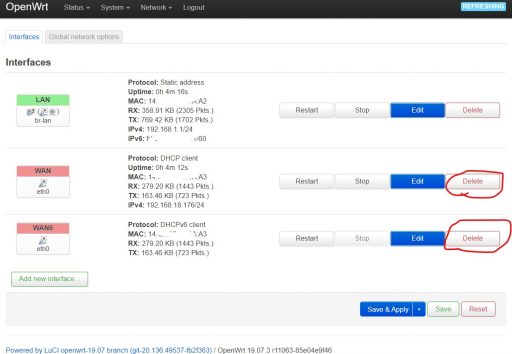
在OpenWrt系统的Luci界面,点“Network – Interfaces”进入网络接口设置界面:

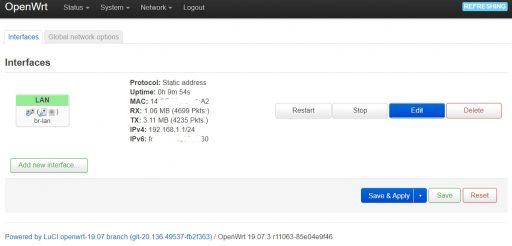
分别点“Delete”按钮将wan、wan6接口删除(注:删wan、wan6时要将物理接口名称记下),再点“Save & Apply”按钮保存并应用:

2、以原先wan口的物理接口为基础,虚拟出多个网络接口
以我的TL-WR720N为例,原物理接口名称是eth0,我们利用macvlan虚拟出两个网络接口,分别命名为veth1和veth2。
ip link add link eth0 name veth1 type macvlan
ifconfig veth1 up
ip link add link eth0 name veth2 type macvlan
ifconfig veth2 up
然后可以输入如下命令,看看veth1、veth2是否已经生成成功:
ifconfig

3、以新生成的虚拟接口设置多拨
在网络接口设置界面,点“Add new interfaces…”增加新接口:

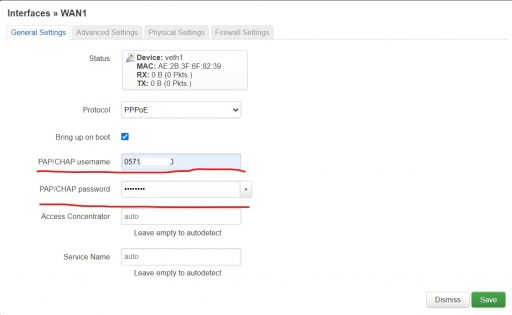
输入名称wan1,选PPPoe协议(注:其实选DHCP协议也是可以测试的),选接口veth1,再点”Create interface“按钮:

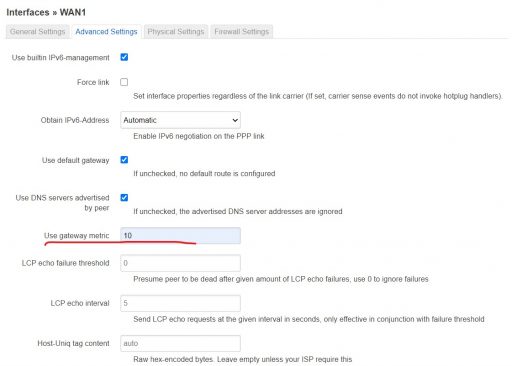
在”General Settings“里,设置宽带拨号的账号及密码,然后再进入”Advanced Settings“:

这里要设置metric值,再次重申这一步非常重要,如果不设置,后面mwan3配置将不起作用。然后再进入”Firewall Settings“:

防火墙区域设置为wan,点”Save“按钮将以上所有输入保存,然后系统会自动回到Interfaces设置界面,点”Save & Apply“按钮使设置生效:

看到没有:wan1接口通过PPPoe拨号已取得公网IP地址,显示连接成功。
同理,再利用veth2虚拟网络接口,设置wan2接口,PPPoe账号及密码与wan1一样,metric值输入20(与wan1的不一样就行),防火墙区域还是选wan,点”Save“,再点”Save & Apply“:

设置完成后,可以看到wan2也取得了公网IP地址,而且与wan1的地址是不一样的,这表明该宽带运营商是至少支持两拨的,是否支持三拨、四拨,大家需要再增加虚拟网络接口进行测试才行,这里就不再展开了。
4、设置开机启动
按照上面的设置方法,veth1、veth2在系统重启后是不会自动产生的,因此为了保证单线多拨功能一直有效,我们需要设置开机启动。
点”System – Startup“进入开机启动设置界面,点”Local Startup“,在输入框的exit 0语句之前输入:
ip link add link eth0 name veth1 type macvlan
ifconfig veth1 up
ip link add link eth0 name veth2 type macvlan
ifconfig veth2 up
见下图:

点”Save“保存,下次启动就OK了。
三、负载均衡
负载均衡就用mwan3应用,与多线多拨的设置方式一样,这个我们已经在前面的文章中详细讲解过了,这里就略过了。